How to Prepare Your Engine for Supercharger Installation
Table of Contents
- Why Engine Prep Determines Supercharger Success
- Step 1: Run an Engine Compression Test for Forced Induction
- Step 2: Assess Fuel System Capacity Before Boost
- Step 3: Confirm Ignition Timing and Spark Plug Readiness
- Step 4: Inspect Cooling and Lubrication Systems
- Step 5: Verify Belt, Pulley, and Drive Components
- How Much Horsepower Do Superchargers Add?
- Best Supporting Mods for Supercharger Reliability
- Frequently Asked Questions
Last Updated: September 7, 2026
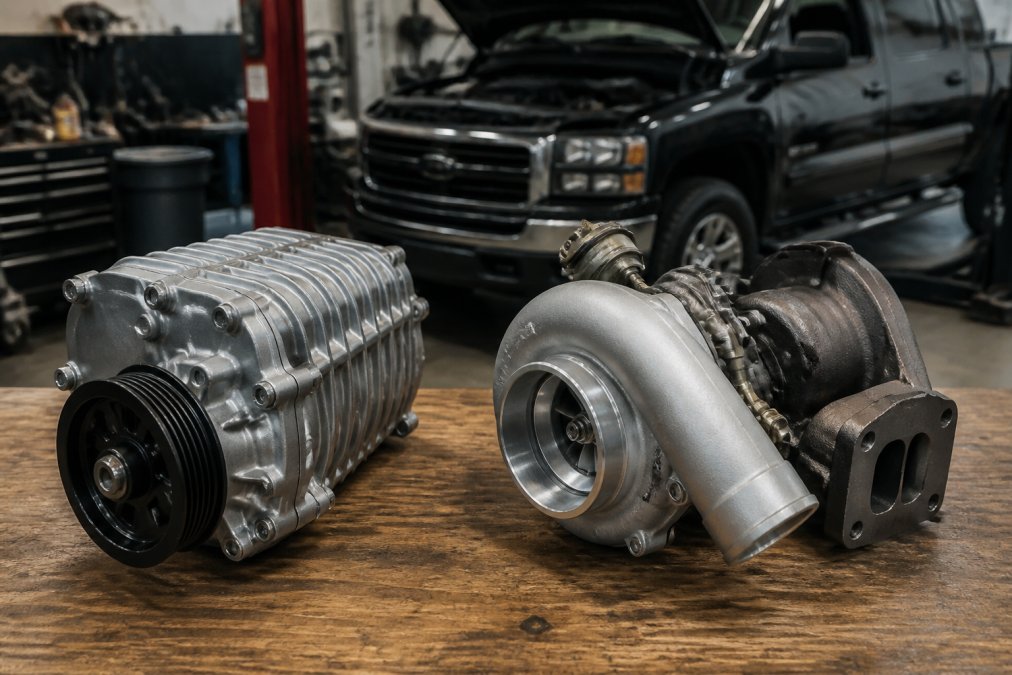
The global automotive supercharger market is projected to grow from USD 9.91 billion in 2026 to USD 15.71 billion by 2035, according to Market Research Future's 2026 automotive supercharger market report. That growth reflects a simple truth: more enthusiasts than ever are chasing forced induction. But the difference between a reliable build and a blown motor rarely comes down to the supercharger itself. It comes down to how you prepare your engine for supercharger installation. Countless setups fail not because the kit was flawed, but because the engine wasn't ready for boost. Below, we'll walk through the exact pre-flight checks that separate a smooth installation from a costly rebuild.
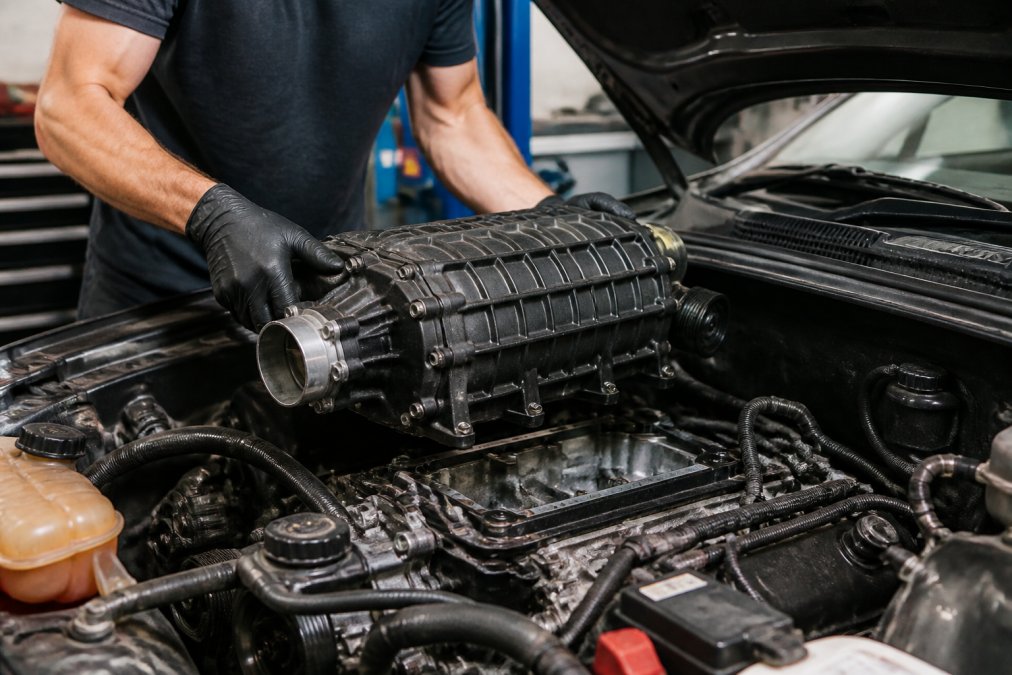
Engine preparation for a supercharger installation is the process of verifying that your engine's compression, fuel delivery, ignition, cooling, and drive components can safely handle increased boost pressure. Skipping these checks is the fastest way to turn a $5,000 upgrade into a $5,000 repair bill. Most modern engines don't require a full rebuild to run boost safely, they require methodical verification.
Why Engine Prep Determines Supercharger Success
Most guides focus on the supercharger itself, when the real variable is the engine's baseline health. A supercharger multiplies whatever stress already exists in your engine, if you have a weak cylinder, a lean fuel condition, or marginal cooling, boost will find it quickly and amplify the failure.
Despite advancements in supercharger development, significant misconceptions persist regarding proper selection and application for specific engine setups, as documented in Engine Builder Magazine's 2024 supercharger selection report. The most persistent myth? That you need a fully built bottom end for any supercharger. In practice, many enthusiasts run superchargers on stock internal components successfully. The key is honest assessment of your engine's current condition, not its theoretical limits.
Key Takeaway
Engine prep is a verification process, not a rebuilding process. Confirm what's healthy, fix what isn't, and most stock engines will handle moderate boost without internal upgrades.
Step 1: Run an Engine Compression Test for Forced Induction
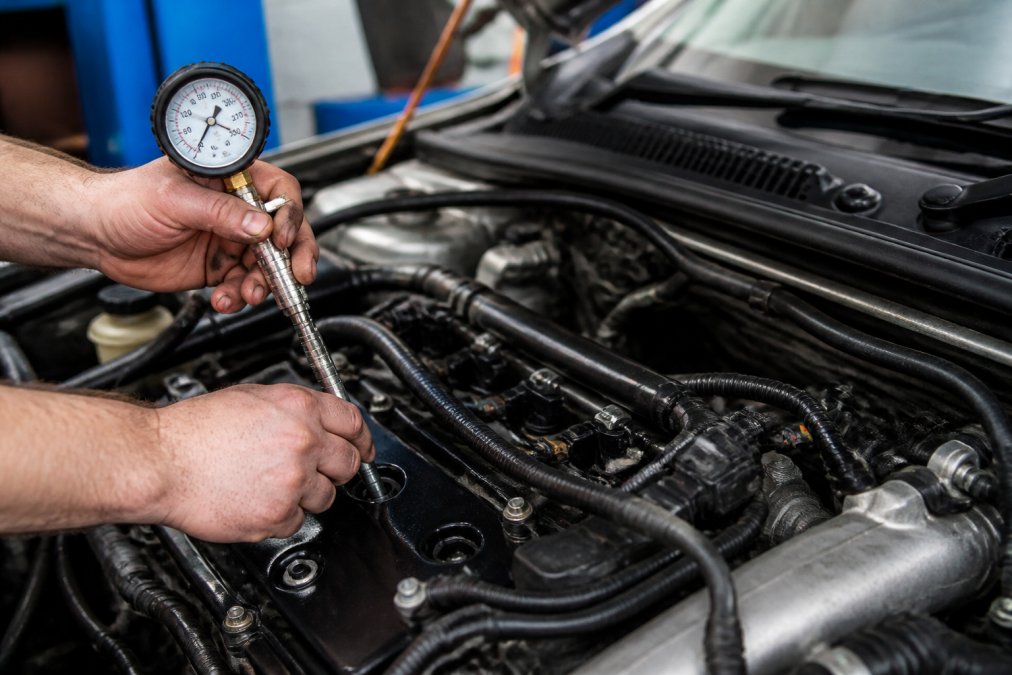
A compression test is the single most important diagnostic before installing a supercharger. It tells you whether your piston rings, cylinder walls, and valves can hold the increased cylinder pressure that boost creates. This is a pass/fail gate, if your engine fails here, a supercharger will destroy it. Here is the exact procedure.
The Step-by-Step Compression Test Procedure
- Warm the engine to operating temperature. Cold engines produce artificially low readings. Run the car for 10-15 minutes until the coolant reaches 180-200°F.
- Disable the ignition and fuel systems. Remove the fuel pump fuse and the ignition coil connector or main ignition fuse. This prevents the engine from starting and protects your catalytic converters from unburned fuel.
- Remove all spark plugs. Use a clean, dry compressed air source to blow out any debris around each plug well before removal. Dirt falling into the cylinder during this test will score the cylinder walls.
- Disconnect the crankshaft position sensor. On most modern vehicles, this is the safest way to prevent the engine from firing while still allowing it to crank. Consult your vehicle-specific service manual for the exact location.
- Thread the compression gauge into the first cylinder. Hand-tighten the gauge hose to avoid cross-threading the aluminum cylinder head.
- Hold the throttle wide open. This is critical. With the throttle closed, the engine cannot draw a full volume of air, and your readings will be artificially low by 15-25 psi.
- Crank the engine through 5-7 compression strokes. Watch the gauge. The needle should climb steadily and then plateau. Record the highest reading.
- Repeat for each cylinder. Crank the same number of revolutions for each cylinder to ensure consistency.
Interpreting Your Results: The Numbers That Matter
Healthy compression varies by engine, but the universal rule is consistency. The maximum allowable variance between the highest and lowest cylinder is 10 percent, if your highest cylinder reads 180 psi, your lowest must read at least 162 psi. A variance greater than 10 percent indicates a mechanical problem that boost will exploit.
Here is a practical interpretation guide:
| Reading Pattern | Likely Cause | Action Required |
|---|---|---|
| All cylinders low (e.g., 120-130 psi on an engine rated for 170) | Worn piston rings or cylinder walls | Engine rebuild or replacement required before boost |
| One cylinder 15-20% lower than others | Worn rings on that cylinder, scored cylinder wall, or leaking intake/exhaust valve | Perform a leak-down test to isolate the cause; repair required |
| Two adjacent cylinders low | Blown head gasket between those cylinders | Head gasket replacement required; check cylinder head for warping |
| All cylinders high (e.g., 200+ psi on an engine rated for 170) | Excessive carbon buildup in the combustion chamber | Perform a decarbonization service; high compression plus boost equals detonation |
The Leak-Down Test: The Definitive Follow-Up
If any cylinder fails the compression test, or if you want absolute certainty before spending thousands on a supercharger kit, perform a leak-down test. This test pressurizes each cylinder with regulated air and measures the percentage of leakage, telling you exactly where the air is escaping.
- Bring the cylinder to Top Dead Center (TDC) on the compression stroke. Both valves must be closed. Use a piston stop tool or a long breaker bar on the crankshaft bolt to prevent the engine from rotating when air pressure is applied.
- Connect the leak-down tester to the cylinder. The tester has two gauges: one for regulated input pressure and one for cylinder pressure.
- Set the regulator to 80-100 psi. The cylinder gauge will read lower if there is leakage.
- Read the leakage percentage. A healthy engine will show 5-10 percent leakage. Up to 15 percent is acceptable for a high-mileage engine. Anything above 20 percent means the engine is not boost-ready.
-
Listen and feel for the leak source:
- Air escaping from the oil filler cap or dipstick tube: Worn piston rings. Boost will cause excessive blow-by, pressurizing the crankcase and pushing oil past seals.
- Air hissing from the throttle body or intake: Leaking intake valve. Under boost, this will cause backfiring through the intake and a lean condition.
- Air bubbling in the radiator or coolant overflow: Leaking head gasket or cracked cylinder head. This is catastrophic under boost.
- Air hissing from the exhaust: Leaking exhaust valve. This will cause misfires and can melt the valve under sustained load.
Watch Out
Never perform a leak-down test on a cold engine. The piston rings will not be properly seated, and you will get falsely high leakage readings that may convince you to rebuild a healthy engine.
The Bottom Line on Engine Health Verification
A compression test takes 30 minutes and costs nothing if you own a gauge (typically $30-50 at any auto parts store). A leak-down tester costs $50-100. These are the cheapest insurance policies you will ever buy for a supercharged engine. If your engine fails these tests, a supercharger will not just fail to make power, it will actively destroy the engine. There is no tuning, fuel system upgrade, or cooling modification that can compensate for a mechanically weak engine under boost.
Key Takeaway
Treat the compression test as a hard pass/fail gate. A 10 percent variance between cylinders is the maximum acceptable limit. If you fail, a leak-down test will tell you exactly what needs to be rebuilt before you spend a dollar on a supercharger kit.
Step 2: Assess Fuel System Capacity Before Boost
Supercharging increases air volume, which demands a proportional increase in fuel delivery. Your engine management system can only compensate within a limited range before injectors max out and the air-fuel ratio goes dangerously lean. Lean conditions cause detonation, and detonation destroys pistons.
The factory fuel pump and injectors on many vehicles have enough headroom for low-boost applications around 5-7 psi. Beyond that, you're asking components to work outside their design envelope. Calculating your fuel system's capacity requires knowing your target horsepower and your injector duty cycle, typically kept under 80 percent for safety margin.
Upgrading Fuel Injectors for Supercharger Demands
When upgrading fuel injectors for supercharger demands, size matters less than matching. A common mistake is installing oversized injectors without proper tuning, which causes poor idle and drivability issues. The correct approach pairs injector sizing with an engine management system calibration designed for those specific injectors.
For example, the VT Superchargers Toyota Hilux 2.7L kit includes a piggyback ECU precisely because fueling strategy is inseparable from the hardware. Off-the-shelf tuning files, like the Mazda 2.0L / 2.5L Supercharger Tuner Kit at $750.00, remove the guesswork by pairing injector data with ignition timing and boost targets. If you're piecing together your own setup, budget for a professional dyno tune. It's not optional.


| Fuel System Component | Stock Vehicle | Low Boost (5-7 psi) | High Boost (8+ psi) |
|---|---|---|---|
| Fuel Injectors | Factory-rated | May suffice if duty cycle stays under 80% | Upgrade required, matched to tune |
| Fuel Pump | Factory-rated | Usually sufficient | High-flow pump recommended |
| Fuel Pressure Regulator | Factory | Verify pressure holds under load | Adjustable regulator recommended |
| Engine Management | Factory ECU | Tune required | Standalone or piggyback ECU required |
Step 3: Confirm Ignition Timing and Spark Plug Readiness
Ignition timing is where supercharger installations go wrong silently. Boost increases cylinder pressure, which increases the engine's appetite for detonation. Retarding timing under boost is standard practice, but you need an engine management system capable of making that adjustment dynamically based on manifold pressure.
Spark plugs deserve more attention than most guides give them. Under forced induction, the stock heat range often runs too hot, which can cause pre-ignition. Most supercharged applications step down one or two heat ranges to pull heat out of the combustion chamber more effectively. The gap typically narrows as well, since denser air-fuel mixtures are harder to ignite.
Watch Out
Running a supercharger on 87-octane fuel is a recipe for detonation. Most forced-induction setups require premium fuel with a sufficient octane rating to prevent knock. If you're not willing to commit to premium fuel, a supercharger isn't the right upgrade.
Step 4: Inspect Cooling and Lubrication Systems
Heat is the silent killer of supercharged engines. Boost generates additional heat through increased cylinder pressure and friction, and if your cooling system can't shed that heat, you'll experience heat soak under sustained load. The factory cooling system on most vehicles handles moderate boost, but track days, towing, or aggressive driving will expose weaknesses. verify accessory compatibility.
Oil is equally critical. Forced induction puts higher loads on bearings and piston rings, which raises oil temperatures. High-quality synthetic oil with the correct viscosity rating is the minimum requirement. Consider an oil cooler if you plan sustained high-load operation. Crankcase ventilation also matters, since boost pressure can push combustion gases past the rings and pressurize the crankcase.
Step 5: Verify Belt, Pulley, and Drive Components
The supercharger is a parasitic accessory driven by your engine's serpentine belt. Unlike an alternator or power steering pump, a supercharger can consume 30-50 horsepower to spin, placing enormous stress on the belt, tensioner, and crankshaft damper. A failure here is a sudden loss of boost, potential belt debris in the engine bay, and in worst cases, a thrown belt that can wrap around the crank pulley and snap the crankshaft. Here is how to verify your drive system is ready for the load.
Belt Tension and Routing: The Physics of Grip
A supercharger requires significantly more belt tension than a stock accessory drive. The belt must transfer high torque without slipping, especially at the moment of sudden throttle application when the supercharger's internal rotors or impeller suddenly demand power.
- Stock tensioners are often inadequate. Many factory automatic tensioners have a limited travel range and cannot maintain proper tension on a supercharger belt. If your supercharger kit does not include a heavy-duty tensioner, you will likely need to upgrade to one. Look for a tensioner with a damped arm and a larger pulley contact area.
- Belt width matters. A 6-rib belt is common on stock engines, but many supercharger kits specify a wider 8-rib belt for the supercharger drive. The wider belt distributes the load and reduces the risk of belt slip. If your kit requires an 8-rib belt, you will need an 8-rib crank pulley and an 8-rib supercharger pulley.
- Check belt alignment with a straightedge. Place a straightedge across the crank pulley and the supercharger pulley. They must be perfectly parallel. A misalignment of even 1/16 of an inch will cause the belt to ride off the pulley edge, leading to rapid wear and eventual belt failure.
Pulley Selection: The Boost Ceiling Calculator
Pulley size is the primary determinant of your supercharger's boost output. The relationship is a simple ratio: supercharger RPM = (Crank Pulley Diameter / Supercharger Pulley Diameter) × Engine RPM. A smaller supercharger pulley spins the blower faster, producing more boost but also generating more heat and demanding more from your fuel system and engine internals.
For example, on a VT Superchargers Mazda kit, the 61 mm pulley produces approximately 7 psi of boost, while the 63 mm pulley produces approximately 5.5 psi. The difference is not just peak boost, it is the entire thermal and fueling envelope. The 61 mm pulley requires premium fuel, a proper tune, and a cooling system that can handle the additional heat. The 63 mm pulley is a safer choice for a stock engine with marginal cooling.

Pro Tip
When selecting a pulley, do not chase the highest boost number. Select the pulley that matches your engine's preparation level. If you have not upgraded your fuel pump and injectors, run the smaller boost pulley. You can always swap pulleys later after you have addressed supporting modifications.
The Harmonic Balancer: The Overlooked Failure Point
The harmonic balancer (crankshaft damper) absorbs torsional vibrations from the crankshaft. A supercharger adds significant torsional load, and a deteriorating balancer will allow these vibrations to damage the supercharger's internal bearings and, worse, the crankshaft itself.
- Inspect the balancer for signs of wear. Look for cracks in the rubber isolator ring, separation between the inner hub and outer ring, or any wobble when the engine is running.
- Replace the balancer if your engine has high mileage. A general rule is to replace the harmonic balancer on any engine with over 100,000 miles before installing a supercharger. The cost is typically $100-300 for a quality replacement, which is trivial compared to the cost of a supercharger rebuild or a new crankshaft.
- Use a damper designed for forced induction. Some aftermarket companies offer dampers with a thicker hub and additional mass to handle the increased torsional load. If your engine has a known weak spot in this area, invest in a performance damper.
Safety Monitoring: Gauges and Fail-Safes
This is the step most guides miss entirely. Once the supercharger is installed, you are operating an engine under conditions the factory never intended. You need real-time visibility into what is happening inside the engine, and you need automatic fail-safes to prevent catastrophic damage when something goes wrong.
Essential Gauges for Supercharged Engines:
- Wideband Air-Fuel Ratio (AFR) Gauge: This is the single most important gauge on a supercharged engine. It measures the actual air-fuel mixture in the exhaust. Under boost, you want to see an AFR of approximately 11.5:1 to 12.0:1. If you see 13:1 or leaner under boost, you are detonating and will destroy pistons within seconds. A quality wideband gauge and sensor costs $200-300 and is non-negotiable.
- Boost Gauge: This tells you the actual manifold pressure the supercharger is producing. It verifies that your pulley selection is producing the expected boost and that there are no leaks in the intake system. A mechanical boost gauge costs $50-100.
- Oil Pressure Gauge: Supercharging increases load on bearings and raises oil temperatures. A sudden drop in oil pressure under boost is a warning of impending bearing failure. An electrical oil pressure gauge with a sender costs $100-150.
- Oil Temperature Gauge: Forced induction raises oil temperatures significantly. Sustained oil temperatures above 250°F will break down the oil's lubricating properties. An oil temperature gauge costs $50-100.
Electronic Fail-Safes:
- Fuel Pressure Safety Switch: This device cuts ignition power or signals the ECU to reduce boost if fuel pressure drops below a safe threshold. If your fuel pump fails under boost, this switch can save your engine from a lean detonation event. Cost: $50-150.
- Low Oil Pressure Shutoff: Some aftermarket ECUs and standalone safety modules can be programmed to cut ignition or reduce engine speed if oil pressure drops below a preset level. This is a critical fail-safe for high-mileage engines.
- Data Logging: A simple OBD-II Bluetooth adapter paired with a smartphone app like Torque Pro can log RPM, throttle position, coolant temperature, and knock sensor activity. Reviewing logs after a hard pull can reveal dangerous trends before they become catastrophic failures.
Watch Out
Do not drive a supercharged car without a wideband AFR gauge and a boost gauge. You are flying blind. A lean condition under boost can destroy an engine in less than 10 seconds. The $250 you spend on gauges is the cheapest insurance you will ever buy for your build.
The Drive System Checklist
Before you install the supercharger, complete this verification checklist:
- Belt tensioner has adequate travel and is in good condition
- Belt alignment is within 1/16 inch across all pulleys
- Harmonic balancer shows no cracks or separation (replace if over 100,000 miles)
- All accessory pulleys (alternator, water pump, power steering) spin freely without noise
- Supercharger pulley size matches your fuel system and engine preparation level
- Wideband AFR gauge installed and calibrated
- Boost gauge installed and leak-checked
- Oil pressure gauge installed and verified against known-good readings
Key Takeaway
The drive system is not just a belt and a pulley, it is the mechanical link between your engine and the supercharger, and it is the first line of defense against catastrophic failure. Verify belt tension, replace the harmonic balancer on high-mileage engines, and install safety monitoring gauges before you ever start the engine with the supercharger installed.
How Much Horsepower Do Superchargers Add?
Realistic expectations prevent disappointment. A supercharger on a healthy stock engine typically adds 30-40 percent more horsepower at the wheels with a proper tune, assuming the supporting modifications, fuel system capacity, and cooling are all in place. Skip any of those, and the number drops while the risk climbs.
The VT Superchargers Toyota Hilux 2.7L kit, for instance, documents 40 percent more horsepower than stock at 7 psi. That's a verifiable, realistic gain for a bolt-on kit on a stock engine. The trend across the industry, noted by ProCharger's 2026 verified horsepower data, is toward verified crankshaft numbers rather than optimistic estimates. Trust manufacturers who publish real dyno results.
Best Supporting Mods for Supercharger Reliability
The best supporting mods for supercharger reliability focus on the systems we've covered: fuel, ignition, cooling, and lubrication. Start with a quality tune, since it ties everything together. Add a wideband air-fuel ratio gauge so you can monitor mixture under load. Consider an intercooler if your kit doesn't include one, since cooler intake air reduces detonation risk and preserves power.
Beyond that, the list is short: high-flow fuel injectors matched to your power target, a colder spark plug heat range, synthetic oil, and possibly an oil cooler. Skip the cosmetic upgrades and invest where the engine actually needs support. A common mistake is spending on exhaust systems before verifying fuel delivery, the engine needs fuel and spark control before it needs better flow out the tailpipe.
Key Takeaway
The most reliable supercharger builds are the most boring ones: stock internals, proper fuel, correct tuning, and meticulous maintenance. Excitement belongs in the driving, not in the risk you're taking with your engine.
Preparing your engine for supercharger installation isn't complicated, but it does require discipline. Run the compression test, verify fuel capacity, check ignition timing, inspect cooling and lubrication, and confirm your drive components are sound. VT Superchargers builds bolt-on kits engineered for precise, OEM-style fitment across Dodge, Ford, Jeep, Mazda, Nissan, Suzuki, and Toyota platforms, with a 24-month warranty backing every purchase. Register with VT Superchargers to get the support of approved installers and a kit matched to your engine's actual preparation level.
Frequently Asked Questions
Can a stock engine handle a supercharger?
Yes, many stock engines can handle a supercharger safely, especially with a bolt-on kit running moderate boost. The key is verifying engine health first. Performing an engine compression test for forced induction confirms the rings and valves seal properly. Using high-quality oil and premium fuel prevents detonation. Most modern engines have forged internals or conservative factory tuning that leaves room for 5-7 psi of boost without internal upgrades.
What should I upgrade when installing a supercharger?
Focus on supporting systems rather than internal parts. Upgrading fuel injectors for supercharger demands ensures the air-fuel ratio stays safe. A higher-flow fuel pump may also be necessary. Check spark plugs and consider a colder heat range. Inspect the cooling system and oil condition. For higher boost levels, upgrading the clutch or drivetrain components helps manage added torque without failure.
How do I know if my engine internals are ready for forced induction?
Start with a compression and leak-down test. Compression readings should be within 10% across all cylinders. A leak-down test reveals worn rings, valves, or head gasket issues. Listen for unusual engine noise and check oil pressure. If the engine has high mileage or consumes oil, address those problems first. A healthy stock engine with proper maintenance is ready for a moderate boost supercharger installation.
How much horsepower do superchargers add?
A typical bolt-on supercharger kit adds 30-40% more horsepower at 7 psi. For example, a 200 hp engine can produce roughly 270-280 hp after installation. The exact gain depends on engine efficiency, exhaust restrictions, and tuning quality. The automotive supercharger market is projected to reach USD 15.71 billion by 2035, reflecting growing demand for reliable power gains. Check verified dyno numbers from the manufacturer before purchasing.
Related post


RECENT POSTS